

A Sitting Toilet Is Not Just a Fixture It’s a Health Investment
Sitting toilets have become a standard in modern homes, not only for comfort but also for health and hygiene. Yet, many homeowners still think toilet installation is a job only for professionals. With the right tools and guidance, installing a sitting toilet can be a DIY task that saves you time, money, and stress.
Recent innovations in home plumbing make toilet installation much easier. For example, tool-free systems from brands like TOTO or American Standard allow toilets to be installed without cement, screws, or complex tools. These solutions are ideal for modern homes and apartments with limited space.
Table of Contents
Quick-Connect Systems of Toilet
Quick-connect systems allow for easy installation by simply aligning and locking the toilet with a rubber ring and clamp system. This eliminates the need for drilling or permanent fixes, which means you can remove and reinstall it anytime for maintenance.
- Double-layer Seal: Prevents leaks using flexible, high-pressure EPDM rubber without glue.
- Clamp Lock System: Makes adjustments easy even after installation.
- Adjustable Flange: Perfect for uneven floors thanks to its height-tuning thread.
Pro tip: Make sure the waste pipe is sloped at a minimum of 2% to ensure smooth drainage and avoid clogs.
When Should You Install a Toilet Yourself?
- Small bathroom renovations
- Replacing an old toilet with a modern unit
- Temporary housing and rental units
- Modular bathroom setups
DIY installation saves money and empowers homeowners to understand their own plumbing systems. It also prepares you for future maintenance or troubleshooting needs.
Step-by-Step Guide to Installing a Sitting Toilet
1. Prepare Tools and Materials
- Toilet (preferably quick-connect)
- Rubber or wax ring
- Flange and pipe connector
- Gloves, cleaning cloth, bucket
- Wrench or pliers (optional)
2. Shut Off the Water Supply
Turn off the water valve before starting. Drain the pipes to avoid spills during installation.
3. Install the Flange

If there is no flange, install one securely above the waste pipe. Adjustable flanges are ideal for slanted floors.
What is a Pipe Flange? and How to Instal it?
In the world of piping whether for household use, industrial purposes, or commercial buildings—flanges are vital components. Although often overlooked by the general public, flanges play a key role in determining the strength, durability, and efficiency of a piping system. But what exactly is a pipe flange? What is its main function and why is it so important in our modern lives?
This article will comprehensively explore the definition of a flange, its various types, installation methods, and the latest flange technologies that simplify the work of technicians and everyday users. All information is presented naturally, in an easy-to-understand way for anyone interested in learning more about piping systems.
Definition of a Pipe Flange
A flange is a ring-shaped or flat disc component used to connect two parts of a pipe, valve, pump, or other equipment in a piping system. It allows for strong, secure, and removable connections without damaging the pipes or joints.
Main Functions of Flanges in a Piping System
Here are several main functions of pipe flanges:
- Connecting components: Flanges join two pipe ends or connect a pipe to other equipment like pumps or valves.
- Easing maintenance: Flanges make connections easy to disassemble for repair, replacement, or inspection.
- Enhancing pressure resistance: Flanges can withstand high pressure, making them suitable for water, hot water, and gas systems.
Types of Commonly Used Flanges
Here are several types of flanges commonly found in piping projects:
Welding Neck Flange

A Welding Neck Flange is a type of flange designed to be welded directly to a pipe. It features a long tapered hub that provides excellent stress distribution between the pipe and the flange, making it ideal for high-pressure and high-temperature applications. Commonly used in critical industries such as oil & gas, petrochemical, and power generation, this flange type ensures a secure, leak-proof connection and is typically used with butt-welded pipe systems.
Slip-On Flange
A Slip-On Flange is a type of flange that slides over the end of a pipe and is then welded both inside and outside to provide strength and prevent leakage. It is easy to install and align, making it a cost-effective option for low-pressure and low-temperature applications. Slip-on flanges are commonly used in water, oil, and gas pipelines due to their simple design and reliable performance.
Blind Flange
A Blind Flange is a solid disk-shaped flange used to close the end of a piping system or pressure vessel opening. It has no bore, making it ideal for isolating sections of a pipeline or for future expansion. Blind flanges are commonly used in high-pressure applications where a secure seal is essential, and they also allow easy access for inspection or maintenance.
Threaded Flange
A Threaded Flange is a type of flange that has internal threads, allowing it to be screwed directly onto a pipe without welding. This makes it ideal for low-pressure, non-critical applications where welding is not feasible or desirable. Commonly used in water and gas lines, threaded flanges offer easy installation and removal, especially in systems requiring frequent maintenance or adjustments.
Socket Weld Flange
A Socket Weld Flange is a type of flange designed for small-diameter, high-pressure piping systems. It features a recessed area where the pipe is inserted and then fillet welded around the hub. This design ensures a smooth bore and strong connection, reducing the risk of leakage and turbulence. Socket weld flanges are commonly used in chemical processing, hydraulic systems, and steam lines.
4. Position the Seal Ring
Place the wax or rubber seal ring at the center of the flange. This prevents leaks and bad odors.
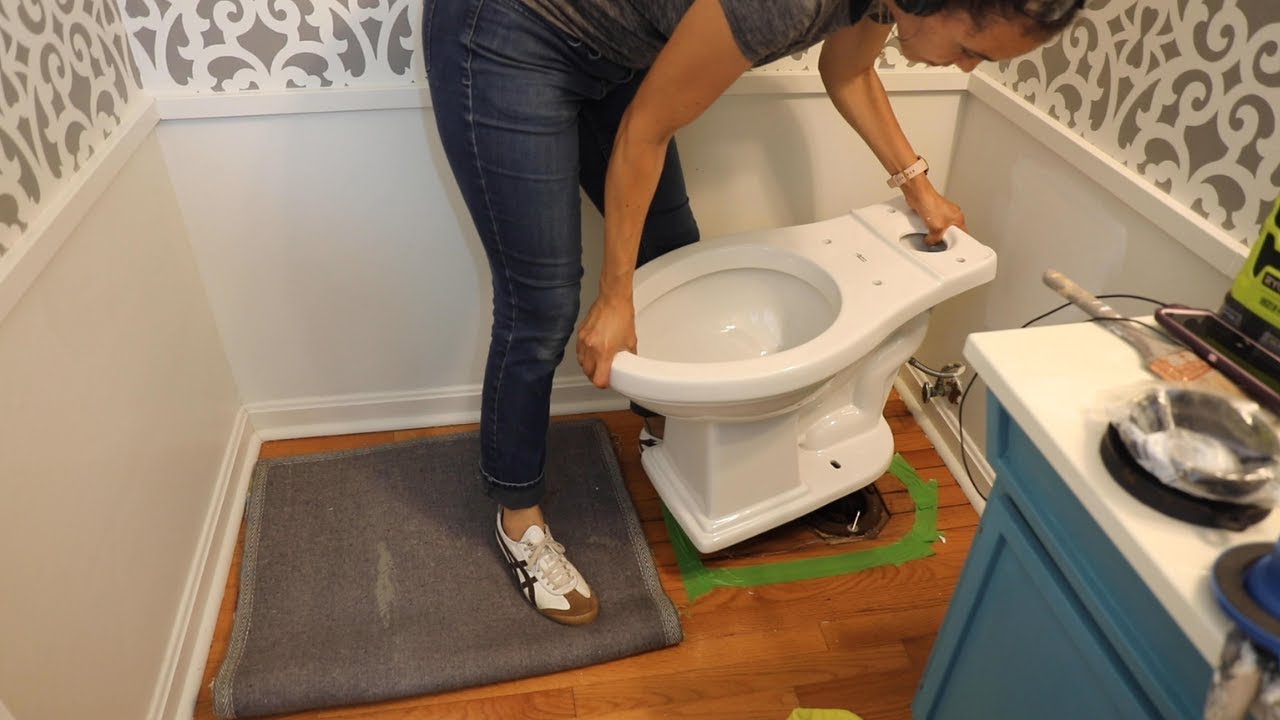
5. Mount the Toilet
Lower the toilet over the flange, press gently, and lock it into place. Make sure there’s no gap between the base and the floor.
6. Connect the Water Hose
Attach the water supply hose to the tank. Tighten the connections and check for leaks. Use seal tape if needed.
7. Test the System
Turn on the water, fill the tank, and flush. Observe any leaks or abnormal sounds.
8. Final Clean-up
Wipe down the toilet and surrounding area. Your new toilet is ready for use!
Common Mistakes to Avoid
- Incorrect wall-to-pipe distance: Standard is 30 cm.
- Uneven floors: Use a level tool before installing.
- Reusing damaged seals: Always replace with new wax/rubber rings.
Social Relevance and Impact of Toilet Innovation
Proper toilet installation improves hygiene and sanitation, reduces plumbing costs, and ensures safer living conditions. Quick-install toilets also provide affordable solutions for rural areas, disaster relief shelters, and low-income housing.


